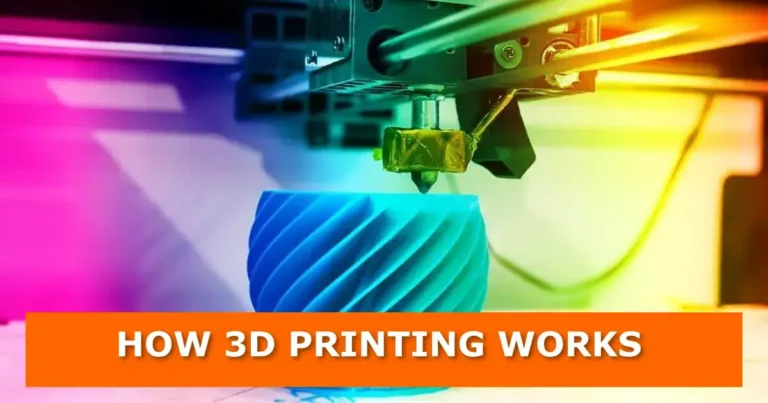
How 3D Printing Works

How 3D printing works

Table of contents

3D printing or additive manufacturing is the process of making three-dimensional solid objects from a digital file. The creation of a 3D printed object is achieved using additive processes. In an additive process, an object is created by laying down successive layers of material until the entire object is created. Each of these layers can be seen as a thinly sliced horizontal cross-section of the eventual object.

How does 3D Printing work?

It all starts with making a virtual design of the object you want to create. This virtual design is made in a CAD (Computer-Aided Design) file using a 3D modeling program (for the creation of a new object) ór with the use of a 3D scanner (to copy an existing object). This scanner makes a 3D digital copy of an object and puts it into a 3D modeling program.

To prepare the digital file created in a 3D modeling program for printing, the software slices the final model into hundreds or thousands of horizontal layers. When this prepared file is uploaded to the 3D printer, the printer creates the object layer by layer. The 3D printer reads every slice (or 2D image) and proceeds to create the object blending each layer with no sign of the layering visible, resulting in one three-dimensional object.

Methods and technologies of 3D Printing

Not all 3D printers use the same technology to realize their objects. There are several ways to do it and all those available as of 2012 were additive, differing mainly in the way layers are build to create the final object. Some methods use melting or softening material to produce the layers. Selective laser sintering (SLS) and fused deposition modeling (FDM) are the most common technologies using this way of printing. Another method of printing is to lay liquid materials that are cured with different technologies. The most common technology using this method is called stereolithography (SLA).

Selective laser sintering (SLS)

This technology uses a high-power laser to fuse small particles of plastic, metal, ceramic, or glass powders into a mass that has the desired three-dimensional shape. The laser selectively fuses the powdered material by scanning the cross-sections (or layers) generated by the 3D modeling program on the surface of a powder bed. After each cross-section is scanned, the powder bed is lowered by one layer thickness. Then a new layer of material is applied on top and the process is repeated until the object is completed.

All untouched powder remains as it is and becomes a support structure for the object. Therefore there is no need for any support structure which is an advantage over SLS and SLA. All unused powder can be used for the next printing. SLS was developed and patented by Dr. Carl Deckard at the University of Texas in the mid-In the 1980s, under the sponsorship of DARPA.

Animation of the SLS process

Subscribe to Gachoki Studios

Fused deposition modeling (FDM)

The FDM technology works using a plastic filament or metal wire which is unwound from a coil and supplies material to an extrusion nozzle which can turn the flow on and off. The nozzle is heated to melt the material and can be moved in both horizontal and vertical directions by a numerically controlled mechanism, directly controlled by computer-aided manufacturing (CAM) software package. The object is produced by extruding melted material to form layers as the material hardens immediately after extrusion from the nozzle.

FDM was invented by Scott Crump in the late ’80s. After patenting this technology he started the company Stratasys in 1988. The software that comes with this technology automatically generates support structures if required. The machine dispenses two materials, one for the model and one from a disposable support structure.

The term fused deposition modeling and its abbreviation to FDM are trademarked by Stratasys Inc. The exactly equivalent term, fused filament fabrication (FFF), was coined by the members of the RepRap project to give a phrase that would be legally unconstrained in its use.

Animation of the FDM process

Subscribe to Gachoki Studios

Stereolithography (SLA)

The main technology in which photopolymerization is used to produce a solid part from a liquid is SLA. This technology employs a vat of liquid ultraviolet curable photopolymer resin and an ultraviolet laser to build the object’s layers one at a time. For each layer, the laser beam traces a cross-section of the part pattern on the surface of the liquid resin. Exposure to the ultraviolet laser light cures and solidifies the pattern traced on the resin and joins it to the layer below.

After the pattern has been traced, the SLA’s elevator platform descends by a distance equal to the thickness of a single layer, typically 0.05 mm to 0.15 mm (0.002″ to 0.006″). Then, a resin-filled blade sweeps across the cross-section of the part, re-coating it with fresh material. On this new liquid surface, the subsequent layer pattern is traced, joining the previous layer. The complete three-dimensional object is formed by this project. Stereolithography requires the use of supporting structures that serve to attach the part to the elevator platform.

This technique was invented in 1986 by Charles Hull, who also at the time founded the company, 3D Systems.

Animation of the SLA process

https://youtu.be/jeCHKDxQQh0
Subscribe to Gachoki Studios

Applications

Applications include design visualization, prototyping/CAD, metal casting, architecture, education, geospatial, healthcare, and entertainment/retail.

Other applications would include reconstructing fossils in paleontology, replicating ancient and priceless artifacts in archaeology, reconstructing bones and body parts in forensic pathology, and reconstructing heavily damaged evidence acquired from crime scene investigations.

In 2007 the use of 3D printing technology for artistic expression was suggested. Artists have been using 3D printers in various ways.

As of 2010 3D printing technology was being studied by biotechnology firms and academia for possible use in tissue engineering applications where organs and body parts are built using inkjet techniques. Layers of living cells are deposited onto a gel medium and slowly built up to form three-dimensional structures. Several terms have been used to refer to this field of research like organ printing, bio-printing, and computer-aided tissue engineering.

Industrial printing

In the last couple of years, the term 3D printing has become more known and the technology has reached a broader public. Still, most people haven’t even heard of the term, while the technology has been in use for decades. Especially manufacturers have long used these printers in their design process to create prototypes for traditional manufacturing and research purposes. Using 3D printers for these purposes is called rapid prototyping.

Why use 3D printers in this process you might ask yourself. Now, fast 3D printers can be had for tens of thousands of dollars and end up saving the companies many times that amount of money in the prototyping process. For example, Nike uses 3D printers to create multi-colored prototypes of shoes. They used to spend thousands of dollars on a prototype and wait weeks for it. Now, the cost is only in the hundreds of dollars, and changes can be made instantly on the computer and the prototype reprinted on the same day.

Besides rapid prototyping, 3D printing is also used for rapid manufacturing. Rapid manufacturing is a new method of manufacturing where companies are using 3D printers for short-run custom manufacturing. In this way of manufacturing, the printed objects are not prototypes but the actual end-user product. Here you can expect more availability of personally customized products.

Personal printing

Personal 3D printing or domestic 3D printing is mainly for hobbyists and enthusiasts and started growing in 2011. Because of rapid development within this new market printers are getting cheaper and cheaper, with prices typically in the range of $250 – $2,500. This puts 3D printers into more and more hands.

The RepRap open source project ignited this hobbyist market. For about a thousand dollars people have been able to buy the RepRap kit and put together their 3D printer, complete with any customizations they were capable of making. What speeds the development is the open-source idea. Everybody working on the RepRap shares their knowledge so other people can use it and improve it again.

This rapid development of open-source 3D printers is gaining interest in both the developed as well as the developing world and it enables both hyper-customization and the use of designs in the public domain to fabricate open-source appropriate technology through conduits such as Thingiverse and Cubify. This technology can also assist in sustainable development as such technologies are easily and economically made from readily available resources by local communities to meet their needs.

3D Printing services

Not everybody can afford or is willing to buy their 3D printer. Does this mean you cannot enjoy the possibilities of 3D printing? No, not to worry. There are 3D printing service bureaus like Shapeways and Ponoko that can very inexpensively print and deliver an object from a digital file that you simply upload to their user-friendly website. You can even sell your 3D designs on their website and make a little money out of it!

If you don’t design your 3D models, you can still print some very nice objects. There are model repositories such as Thingiverse, 3D Warehouse, and 3D Parts Database that have model files you can download for free.

Some companies offer their services business-to-business. When, for instance, you have an architecture practice and you need to build model scales it is very time-consuming doing this the old fashion way. There are services where you can send your digital model and they print the building on a scale for you to use in client presentations. This kind of service can already be found in a lot of different industries like dental, medical, entertainment, and art.

History

In the history of manufacturing, subtractive methods have often come first. The province of machining (generating exact shapes with high precision) was generally a subtractive affair, from filing and turning through milling and grinding.

Additive manufacturing’s earliest applications have been on the tool room end of the manufacturing spectrum. For example, rapid prototyping was one of the earliest additive variants and its mission was to reduce the lead time and cost of developing prototypes of new parts and devices, which was earlier only done with subtractive toolroom methods (typically slowly and expensively). However, as the years go by and technology continually advances, additive methods are moving ever further into the production end of manufacturing. Parts that formerly were the sole province of subtractive methods can now in some cases be made more profitably via additive ones.

However, the real integration of the newer additive technologies into commercial production is essentially a matter of complementing subtractive methods rather than displacing them entirely. Predictions for the future of commercial manufacturing, starting from today’s already- begun infancy period, are that manufacturing firms will need to be flexible, ever-improving users of all available technologies to remain competitive.

Future

It is predicted by some additive manufacturing advocates that this technological development will change the nature of commerce because end users will be able to do much of their manufacturing rather than engaging in trade to buy products from other people and corporations.

3D printers capable of outputting in color and multiple materials already exist and will continue to improve to a point where functional products will be able to be output. With effects on energy use, waste reduction, customization, product availability, medicine, art, construction, and sciences, 3D printing will change the manufacturing world as we know it. If you’re interested in more future predictions and speculations about the future of 3D printing, go visit The Future Of Open Fabrication.

A Blender interface screen recording demonstrating the utilization of the Product Rendering Tools Addon in Blender.
Get Product Rendering Tools Addon

Share With Friends

Facebook
Twitter
LinkedIn
Reddit

Ask a Question

Subscribe
Notify of
guest

0 Comments
Inline Feedbacks
View all comments

More Like This