Creating realistic clouds in Blender doesn’t have to be complicated or time-consuming. You can get convincing results in under a minute.
In this post, you’ll learn how to quickly generate stylized volumetric clouds using Blender’s built-in tools—no third-party add-ons required. We’ll walk through each step, explain why it works, and give tips to help you customize the result.
If you’re experimenting with environmental effects, you may also like simulate rain in Blender to pair weather elements with your clouds.
Step 1: Shape Your Cloud with Metaballs
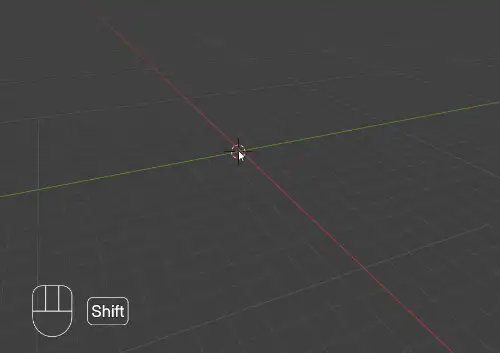
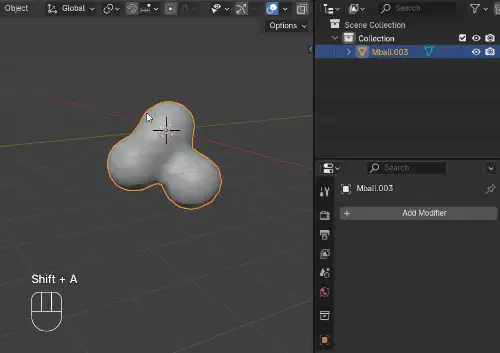
- Start by adding a Metaball to your scene. Metaballs are perfect for organic, blobby shapes like clouds. You’ll find them under Add > Metaball > Ball.
- Press Alt + D to duplicate the metaball a few times and move them around to roughly form the cloud shape you want. Don’t worry about being precise—clouds are naturally irregular. Aim for a clumpy and uneven silhouette that looks cloud-like from different angles.
- Once you’re happy with the shape, select all your metaballs, press Ctrl + A, and choose Visual Geometry to Mesh. This converts your metaball object into an editable mesh, which you’ll need for the next step.
Step 2: Convert the Mesh to a Volume
Now it’s time to give your mesh a volumetric appearance.
- Add an Empty Volume Object from Add > Volume > Empty.
- In the Outliner, select this new volume.
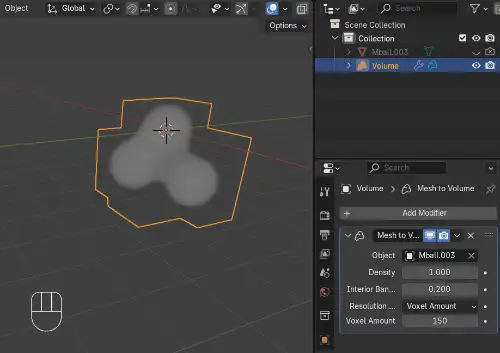
- Add a Mesh to Volume Modifier and assign your converted mesh as the source object.
Blender will now wrap your mesh in volume data, but it may look blocky or too faint. Increase the voxel amount in the modifier to improve detail and smoothness. A higher voxel resolution gives more definition but increases render time, so find a balance that works for your scene.
Step 3: Add Volume Displacement for Realism
To give your cloud a natural, fluffy look, add a Volume Displacement Modifier to the volume object. Then:
- Click New to add a texture slot.
- Head over to the Texture Properties panel.
- Change the texture Type to Clouds.
You can now tweak the Size, Depth, and Strength values to sculpt the internal detail and shape of your cloud. This step makes a huge difference—adjusting these values will help you achieve anything from wispy cirrus to dense cumulonimbus-like clouds.
Step 4: Lighting the Cloud
Good lighting will make your cloud stand out.
- Add an HDRI environment to your world settings for natural light reflections and realistic ambient illumination.
- Place a Spotlight or Sun Lamp and position it to cast light through the volume. Play with intensity, angle, and color temperature to create mood—warm tones for sunsets or cool blue for cloudy skies.
This combo makes the volumetric shading pop and gives your cloud that soft, glowing edge.
Step 5: Moving and Editing Your Cloud
Once you’ve hidden the original mesh from the viewport and render (you can do this in the Outliner by toggling visibility), the volume becomes the visible cloud. But if you need to move the cloud, you’ll have to temporarily unhide the original mesh or the metaballs and move those instead.
This happens because the volume is still referencing the original object’s position in the modifier stack.
Bonus Tips
- Add Color: For stylized or surreal scenes, try using a Principled Volume Shader on a custom volume object.
- Animate Clouds: You can animate the cloud displacement by keyframing the texture coordinates.
- Multiple Clouds: Repeat the process with varied shapes and settings to populate your scene with different clouds.
For additional creative effects, you might also try create floating helium balloons in Blender for playful animations that work well in sky scenes.
To enhance realism, you could also explore Blender subsurface scattering when working with atmospheric materials.
If you’re refining renders, see how to eliminate noise, grain, fireflies from renders in Blender to keep your cloud scenes clean and polished.
For efficient exporting, you might also check how to render transparent PNG images in Blender’s Cycles and Eevee render engines.
For more environmental techniques, you may also enjoy Blender shadow catcher to integrate your clouds with ground shadows in composite renders.
Got Questions?
Have trouble getting the cloud to look right? Wondering how to render it in Eevee or Cycles more efficiently? Drop your questions in the comments below and I’ll help you out.
Take the Next Step
If you enjoyed this tutorial, share it with other Blender users or bookmark it for your next project. Subscribe to the blog for more Blender tips delivered weekly. We cover fast workflows, real-time rendering tricks, and creative inspiration that helps you build better 3D scenes.
Have any ideas or requests for future tutorials? Let us know in the comments. Happy blending.


