
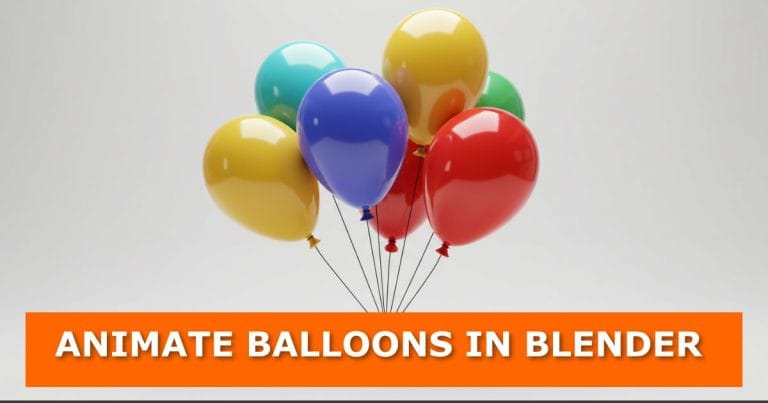
Want to make your Blender projects more fun and lively? In this tutorial, we’ll walk through a quick and easy way to create floating helium balloons using Blender’s built-in cloth simulator.
Whether you’re working on a birthday animation, a party scene, or just want to learn more about Blender’s physics tools, this method gives you simple, realistic results without complicated modelling.
Setting Up the Scene
Start with a new Blender project:
- Delete default objects – Select everything in the scene and press Delete.
- Add a UV Sphere – Press Shift + A → Mesh → UV Sphere.
- Switch to Front View – Press 1 on the number pad.
We’ll shape this sphere into a balloon using proportional editing.
Shaping the Balloon
- Enter Edit Mode.
- Enable Proportional Editing (circle icon at the top).
- Select the bottom vertex, press G then Z, and pull it down to form the balloon’s teardrop shape. Use your scroll wheel to adjust the influence.
- Turn off proportional editing.
- Delete the bottom vertex and use Grid Fill (Ctrl + F → Grid Fill) to close the balloon.
- Smooth it out using the Smooth Vertex Tool.
Now you have the basic balloon shape.
Adding the String
- Select the bottom centre vertex.
- Press E to Extrude, then S to Scale.
- Keep extruding downward to form the string.
- Add segments with Ctrl + R (loop cut) for better deformation.
Tip: Use as many segments as you want—more segments give the string smoother movement.
Assigning Materials
Let’s make things clearer with materials:
- Create a red material for the balloon.
- Create a string material for the rope.
- Assign them in the Materials tab.
- Adjust the Viewport Display Colours so you can see the difference immediately.
Setting Up the Cloth Simulation
Now for the fun part: making the balloon float.
- Go to Physics Properties → Add Cloth.
- Enable Pressure and set strength to around 10.
- Enable Self Collision if you plan to have multiple balloons.
- Under Shape, assign the pin group so the string stays fixed.
If you hit play right now, the balloon will fall due to gravity. To make it float:
- Go to Field Weights → Gravity and set it to -1.
- Press play—your balloon now floats like it’s filled with helium.
Duplicating Balloons
To make a bunch of balloons:
- Enter Edit Mode.
- Select the whole balloon (Ctrl + L).
- Press Shift + D to duplicate.
- Assign different colours to each duplicate.
- Use proportional editing to slightly reshape them so they don’t look identical.
You now have a bunch of colourful floating balloons.
Baking the Simulation
To make the animation stable:
- Go to the Cache section.
- Set the frame range (default is 1–150).
- Click Bake.
Now your balloons will move smoothly every time you play the animation.
Adding a Background, Camera, and Lighting
For a quick render setup:
- Add a Camera (Shift + A → Camera) and move it back.
- Set focal length to about 150mm.
- Add a large Plane for the background and rotate it upright.
- Switch the render engine to Cycles.
- Add Area Lights (Shift + A → Light → Area) and adjust their strength.
- Make your balloons glossy by lowering Roughness in the materials.
Rendering the Animation
Once you’re happy with the scene:
- Go to Output Properties and set your file location.
- Change file format to FFmpeg Video.
- Set container to MP4.
- Go to Render → Render Animation.
You now have a floating helium balloon animation ready to share.
Wrap-Up
And that’s it—you’ve created realistic helium balloons in Blender using the cloth simulator. This method is simple, quick, and great for party scenes or background details.
Want to take it further? Try experimenting with:
- Different balloon shapes
- Multi-coloured strings
- Lighting setups for different moods
If you try this out, let me know in the comments how it went. Got stuck on a step? Ask a question below—I’m happy to help.
Over to You
If you enjoyed this tutorial, subscribe to the blog for more Blender guides and creative workflows. Share this post with other 3D artists, and check back often for new tutorials.
If you’re interested in other creative animation projects, you may also enjoy create a 3D anamorphic screen animation in Blender.
For more modeling ideas, check out how to create realistic pillow in Blender, which also relies on subtle shape adjustments to achieve realism.
To enhance your workflow when dealing with modifiers, you might find how to copy or transfer a modifier from one object to another in Blender useful.
If you want to expand your physics-based projects, you could also explore Blender physics addons for more dynamic simulations.
For clean and polished outputs, see how to eliminate noise, grain, fireflies from renders in Blender.
For more creative effects, you might also like wrap your 3D model in plastic in Blender.
Video Tutorial


