
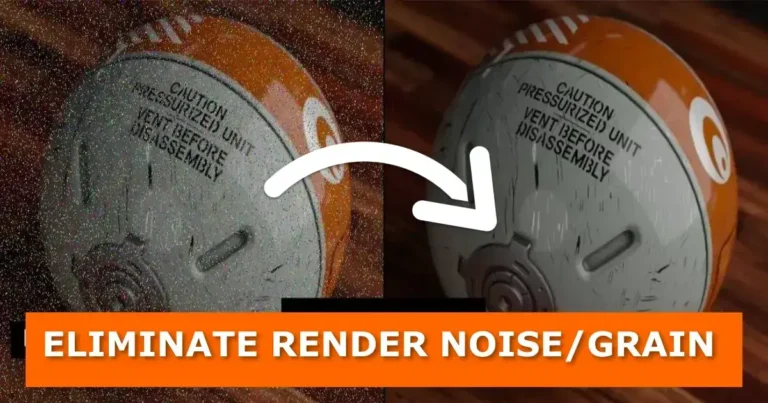
Render noise, grain, and fireflies can really mess up an otherwise amazing render or animation. These little bright spots of light can make your work look less polished. But don’t worry—Blender has several tools and tricks to help you get rid of them. Let’s dive in! In this guide, we’ll walk you through simple and effective ways to clean up your Blender Cycles renders. By the end, you’ll be creating sharper, cleaner images that stand out.
1. Eliminate Render Fireflies with the AI-Powered Denoise Composition Node
Blender’s Denoise node is like magic—it uses AI (Open Image Denoise) to clear up noisy renders. Plus, it lets you render with fewer samples, saving you time. Here’s how to set it up:
- Download and Install NVIDIA OptiX™ so your system is ready for GPU acceleration.
- Switch to Cycles Render. Open Blender, go to the render settings, and choose Cycles as the render engine. Don’t forget to change the render device from CPU to GPU for better performance.
- Activate Denoising Data. Use the illustration below as a reference:

- Render Your Scene and Open the Compositor. Once your scene is rendered, head over to the compositor workspace.
- Add the Denoise Node. Press Shift + A, search for “Denoise,” and add the node to your compositor.
- Connect the Nodes. Use the setup shown in the image below to link the Denoise node properly:

- Enable HDR. Check the HDR box on the Denoise node for better results.
- Render Again. Re-render your scene and check out the difference—it’s like night and day!
Pro Tip: If your computer struggles with performance, try lowering the resolution or reducing the sample count temporarily while setting up the Denoise node.
2. Optimize Sampling and Denoising Settings
Tuning your sampling and denoising settings can make a huge difference in reducing noise while also saving you time. Here’s what I recommend:
Sampling Settings:
- Adjust the number of samples to strike the right balance between quality and render time.
- Turn on “Adaptive Sampling” to let Blender optimize the sample distribution..


Pro Tip: Increase the “Clamp Direct” and “Clamp Indirect” values in the sampling settings. This can help reduce fireflies without sacrificing overall quality.
3. Avoid Noise and Fireflies with Blender’s Eevee Render Engine
If you’re in a hurry or working on a less demanding project, Blender’s Eevee render engine is a fantastic option. Here’s why:
- Real-Time Rendering: Eevee renders in real-time, which is great for quick previews or final renders that don’t require photorealism.
- Shader Compatibility: Eevee uses the same shader nodes as Cycles, so switching between them is seamless.
- Rasterization: Unlike Cycles, Eevee doesn’t rely on ray tracing. Instead, it approximates lighting interactions using rasterization, making it much faster.
Of course, Eevee isn’t as physically accurate as Cycles, but for certain projects, the speed and efficiency make it a great choice.
Pro Tip: Enable “Soft Shadows” and “Screen Space Reflections” in the render settings to boost the quality of your Eevee renders.
4. Save Your Settings as the Default for Future Projects
Once you’ve dialed in your render settings, save them as your default startup file to save time in future projects.
- Go to the top-left corner of Blender and click on File.
- Select Defaults > Save Startup File from the dropdown menu.


Pro Tip: While you’re at it, configure other frequently used settings like camera angles, lighting setups, and workspace layouts so your next project starts off on the right foot.
Let’s Hear From You!
Have your own tips for eliminating noise and fireflies in Blender? Share them in the comments below! If you found this guide helpful, don’t forget to subscribe for more Blender tutorials and tricks.
Stay tuned for updates, and check out our related content to keep improving your Blender skills.
- Share this post with your Blender community.
- Subscribe to our newsletter for the latest tutorials.
- Explore Related Posts Below
Happy blending!


