Blender 4.2 brings some exciting changes, including a streamlined way to import images as planes. If you’re used to relying on the “Import Images as Planes” add-on, you’ll be happy to know that its functionality is now baked directly into Blender. No need to activate add-ons or hunt for extensions—here’s your step-by-step guide to using this feature like a pro.
Why the Change?
Blender’s developers have integrated the “Import Images as Planes” feature into the core software to simplify the workflow. It’s now faster and easier to use without the need for additional setup. Let’s dive into how it works.
Step 1: Adding the Image
In Object Mode, follow these simple steps:

- Press Shift + A to open the “Add” menu. Alternatively, you can click the Add button in the top menu.
- Navigate to Image and select Mesh Plane.
- After selecting Mesh Plane, a file browser will pop up, just like the old add-on.
- Browse to your desired image file.
Step 2: Adjusting Material Settings
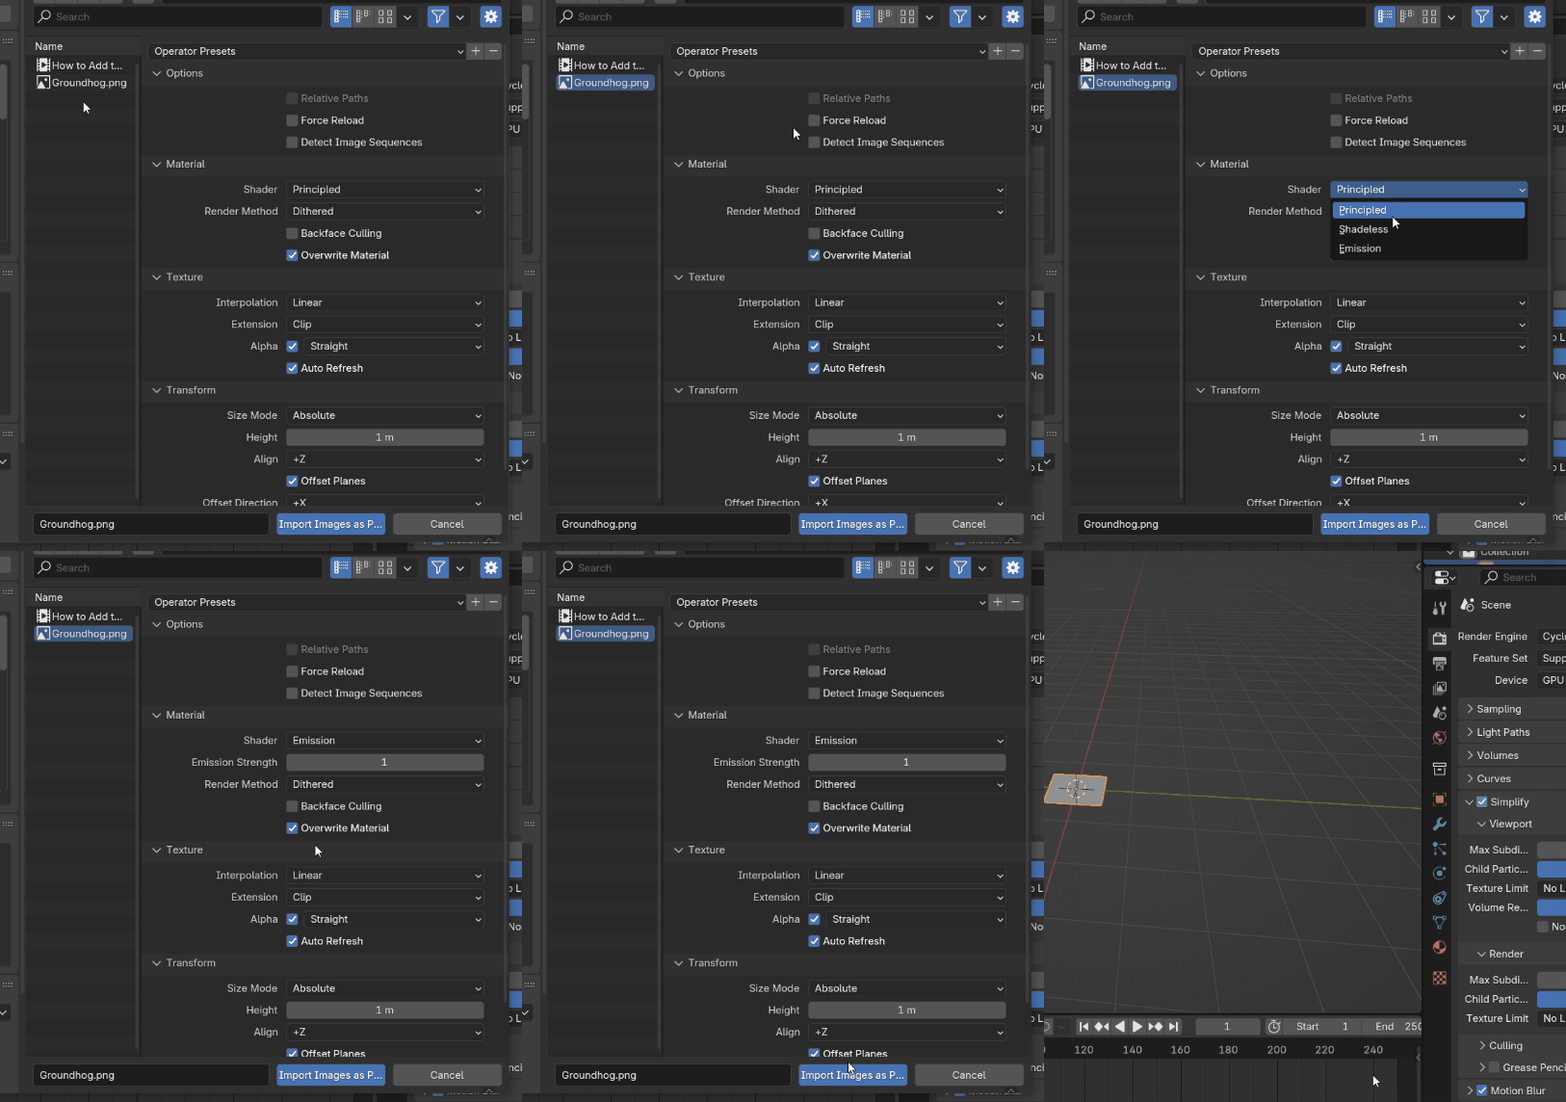
Before importing your image, you’ll see several material setup options. Let’s break them down:

- Principled: Creates a basic Principled Shader setup. This is great for general-purpose workflows.
- Shadeless: Removes most shading effects, giving your plane a flat, unlit appearance.
- Emission: Routes the image through the emission node of the Principled Shader, making it slightly emissive. This setup is perfect for projects that require brighter, glowing visuals, though it might not always look realistic.
My Recommendation: The Emission setting is a favorite for its ability to make images pop in your scene.
Step 3: Importing the Image
Once you’ve selected your material settings:
- Click Import Images as Planes.
- Your image will appear in your scene as a single plane. You can now manipulate it like any other object in Blender—scale it, rotate it, or move it around.
Ready to Try It?
That’s all there is to it! Importing images as planes in Blender 4.2 and above is intuitive and efficient. Now it’s your turn to give it a go.
Join the Conversation
Did this guide help you? Have questions or tips to share? Leave a comment below—I’d love to hear from you! You can also explore related content on our blog for more Blender tutorials.
Stay Connected
If you found this post helpful, don’t forget to:
- Share this guide with your fellow Blender enthusiasts.
- Subscribe to our blog for the latest updates.
- Bookmark this page for quick reference.
If you’re working with reference setups, you may also want to check how to set a background image in Blender for modeling reference, which is another way to bring images into Blender for accuracy.
For workflows that involve multiple textures, you might also like how to add more than one material to a mesh in Blender, which complements imported images.
If you’re dealing with layered textures, you may also enjoy how to add a transparent PNG texture image on top of material in Blender, which works well with image planes.
For video-based textures, you might also check how to set up a video or image sequence texture in Blender, which expands on the same principle.
For related workflows, see Blender shadow catcher to integrate image planes seamlessly into composited scenes.
Stay creative and happy Blending!


