
This Free AI Tool Turns Photos Into 3D Models Locally

Six gigabytes of VRAM. No subscription. No cloud bill. And somehow, a faster result than the “full-power” version of the model. If that sounds like a rumor someone typed into a Discord server at 2 a.m., welcome to the strange, delightful reality of Trellis 2 GGUF — a compressed build of the open-source image-to-3D generator that just made high-end 3D asset creation possible on the kind of GPU sitting in a mid-range gaming laptop.
The video tutorial explaining how it works
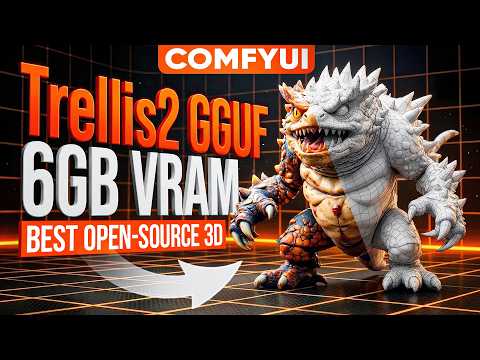
What Even Is Trellis 2, and Why Should You Care?
Trellis 2 has quietly become the reigning champion of open-source image-to-3D generation. Feed it a single image, and it hands back a textured 3D model — no camera rig, no photogrammetry rental, no waiting on a render farm. The catch has always been the price of admission: a 4-billion-parameter model that historically demanded 10 to 12 GB of VRAM just to boot up. For anyone rocking a 6 or 8 GB card, that was a locked door.
Enter GGUF: The Art of Shrinking Without Losing the Plot
GGUF is best understood the way you’d explain 4K video getting compressed down to 1080p — the file shrinks, the memory footprint drops, and for the vast majority of viewers, the difference is nearly impossible to spot. Creator Arawax took that same logic and applied it to Trellis 2, building a configuration (based on the original Trellis 2 repository from Visual Bruno) that loads the model in GGUF format. The twist nobody saw coming: it doesn’t just use less VRAM, it actually runs faster than the uncompressed original.
If you’re still getting your bearings on terms like this, our breakdown of core AI concepts is a solid place to start before diving into the setup below.
What You’ll Need Before You Start
- An Nvidia GPU with at least 6 GB of VRAM (think RTX 3050, RTX 4060, or similar)
- Windows 10 or 11
- The ComfyUI Easy Install script
No manual model downloads required — the installer handles that automatically on first run.
Setting Up Trellis 2 GGUF, Step by Step
Step 1: Grab the Installer
- Download the installation script from pixelinusartistry.com/trellis2gguf
- You’ll receive a .bat file
- Drop it into your add-ons folder and double-click it
Step 2: Let the Base Install Run
- The script pulls in the Arawax GGUF fork, installs dependencies, wheels, and custom nodes
- No manual intervention needed — just let it complete
- This step can take several minutes depending on your internet connection
Step 3: Download the GGUF Models Separately
- On some systems, the built-in model manager can fail due to a version mismatch in the Hugging Face library
- Go back to the same download page and grab download_trellis2gguf.bat
- Drop it into the same add-ons folder and run it
- This fetches the GGUF-modified models, configs, encoders, and decoders
Step 4: Launch ComfyUI and Load the Right Workflow
- Some red error messages on launch are normal — they’re just ComfyUI complaining about models it hasn’t indexed yet, not an actual failure
- Important: older Trellis 2 workflows will not work directly with GGUF nodes, since the parameters differ
- Use a workflow built specifically for GGUF, which swaps the standard Trellis 2 model loader for the GGUF Load Model node
Choosing the Right Quantization Level for Your GPU
The GGUF loader offers four compression tiers — Q4, Q5, Q6, and Q8 — plus the original full-precision option. Based on real-world testing:
- 6 GB of VRAM: Q4 is the sweet spot, landing around 6.1 GB used
- 8–12 GB of VRAM: Q4 through Q8 all work comfortably, and both are faster than the full model
- 16 GB+ of VRAM: Q8 is the recommended pick — faster than the default model in most tests, with quality that’s essentially identical
The Numbers That Matter
Testing on an RTX 5080 with a full pipeline — mesh generation, refinement, texturing, and UV unwrapping — produced results that flip the usual compression trade-off on its head:
- Q4: ~6.1 GB VRAM, 8 minutes 6 seconds
- Q8: ~8.9 GB VRAM, 7 minutes 9 seconds
- Full uncompressed model: ~10–11 GB VRAM, 10 minutes 8 seconds
In other words, the most compressed version saves roughly two full minutes and cuts VRAM demand in half compared to the standard model. Compression usually costs you something. Here, it costs you almost nothing and hands back time.
Can You Actually See the Difference?
The same input image and seed were run through all four quantization levels side by side — organic characters, a hard-surface robot, and an architectural building (architecture being notoriously difficult for 3D generators to nail). Across claws, spikes, surface detail, windows, and balconies, the differences between quant levels were, by the tester’s own admission, nearly impossible to spot even under close comparison.
Running Into Out-of-Memory Errors on 6 GB? Try This
- Drop the resolution in the generation nodes from 1024 down to 512
- Reduce the token count in the relevant nodes
- Lower the texture resolution in the texturing node — the mesh geometry stays intact either way
And three habits worth building in regardless of your GPU size:
- Close Chrome, Discord, and any games before generating — every megabyte counts on 6 GB
- Add the –disable-pinned-memory flag to your ComfyUI startup file to free up GPU memory
- Don’t try to reuse old Trellis 2 workflows as-is — swap in the GGUF loader first
Multi-view generation works too, using the same GGUF loader with multiple reference images fed in.
Where Blender Comes In
The generated meshes land in Blender ready for the next stage of the pipeline, whether that’s rigging, game-engine prep, or retopology. Topology on the raw output is dense, as expected from any AI mesh generator, so a retopology pass is the recommended next step — our guide on reducing geometry and polygon count in Blender and our roundup of the best Blender addons for retopology both pair well with this workflow. Once you’re ready to bring outside meshes or textures into your scene, it’s also worth checking our guide to importing FBX files into Blender.
If AI-assisted 3D pipelines are new territory for you, our overview of AI addons for Blender and our piece on AI-powered motion capture are good companion reads for seeing how far this local-AI trend has already come.
The Bigger Picture
What’s genuinely notable here isn’t just that Trellis 2 got smaller — it’s that smaller turned out to be faster too, on hardware that plenty of working artists and hobbyists already own. That’s a meaningful shift for anyone who assumed AI 3D generation required a rented GPU cluster or a subscription. A modest gaming card is now enough to walk away with a textured, game-ready-adjacent mesh in under ten minutes.
Got a 6 GB Card? Put It to the Test
If you’ve been sitting on the sidelines waiting for AI 3D tools to catch up to your hardware, this is the moment. Try the Q4 build, see how it holds up against your own reference images, and drop a comment with your GPU model and the quant level that worked best for you — it’s shaping up to be genuinely useful data for anyone else on the fence. And if you’re curious where the pipeline goes after the mesh comes out, keep an eye out for more on texturing workflows and Blender-based retexturing techniques coming soon.

What do you think?
Join the Conversation