
When working in Blender, extrude is one of those tools you’ll use over and over again. You probably already know how to pull geometry out or push it in, but did you know there are some hidden tricks that can make your modelling workflow a lot faster?
Let’s walk through some simple but powerful extrude techniques that can save you time and give you more control over your shapes.
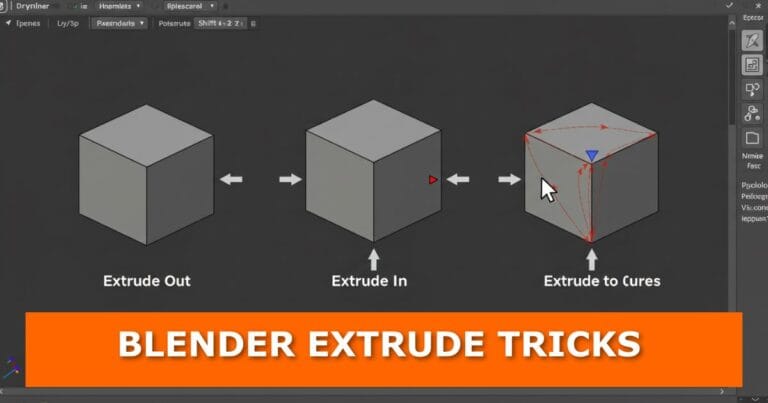
The Basics: Extruding Out and In
You already know the basics:
- Extrude out to pull faces away and add new geometry.
- Extrude in to push geometry inward.
These are the building blocks of most modelling tasks in Blender. But there’s more you can do.
Extrude to Cursor (A Faster Way to Control Position)
Here’s a trick many beginners overlook:
- Hold Control and Right-Click.
- Blender will instantly extrude your selection toward the cursor position.
This saves you from dragging and adjusting manually. Just place your cursor where you want the new geometry to land, and extrude directly there.
Combine Extrude with Scale for Precision
Want more control over your extrusion? Try this combo:
- Hit E to extrude.
- Press S to scale.
This lets you extrude evenly while scaling the geometry inward or outward in one smooth step.
Lock Extrusion to the X and Y Axis
Sometimes, you only want to extrude on specific axes. Here’s how:
- After pressing E to extrude, hold Shift + Z.
This locks the extrusion to the X and Y axes, preventing movement on the Z-axis. It’s perfect for working on flat surfaces or when you want to keep everything aligned horizontally.
Over to You
Now that you know these shortcuts, give them a try in your next Blender project. Experiment with combining them—extrude, scale, and axis locks—to see how quickly your models start to take shape.
For more flexibility when modeling, you might also want to learn how to split and separate an object in Blender when working with extruded geometry.
If you’re learning different modeling workflows, you may also find blockout in Blender helpful for establishing the base structure before adding detail with extrusion.
When working with surface details, you could also explore how to project decals and images onto object surfaces in Blender for combining extrusions with textures.
If you want to improve precision, you can check how to maintain sharp edges when using the subdivision surface modifier in Blender, which pairs well with extrusion techniques.
For more geometry-focused techniques, you might also like how to convert curves into meshes in Blender as a way to combine curve-based designs with extrusion.
Join the Conversation
Do you use any other extrusion tricks in Blender? Drop your favourite tip in the comments. If you found this post helpful, share it with a fellow Blender artist who could use faster modelling shortcuts.
For more Blender tutorials and 3D workflow tips, check out our other posts.
Want more quick Blender tips like this? Subscribe to the blog for regular updates, tutorials, and shortcuts that will make your 3D modelling smoother and faster.
Video Tutorial


