
Tired of manually bending objects and ending up with uneven results? There’s a faster way to get smooth, controlled curves in Blender without fighting your mesh.
In this guide, you’ll learn a simple workflow that uses curves, modifiers, and smart setup to create clean curved objects in minutes. Once you understand it, you’ll use it everywhere, from cables to architectural details.
The Video Tutorial

Why This Method Works Better
Instead of deforming your object directly, you let Blender do the heavy lifting using modifiers.
Key idea:
You build a straight object first, then use a curve to shape it.
This gives you:
- Perfectly smooth curves
- Easy adjustments at any time
- Non-destructive workflow
Step 1: Prepare Your Object Properly
Before adding any curves, start with a clean mesh.
Make sure your object has enough loop cuts.
Without enough geometry, your curve will look blocky or broken.
If needed:
- Go into Edit Mode
- Add loop cuts using Ctrl + R
If your topology feels messy, this guide about how to straighten loop cuts can help.
Important:
More geometry = smoother bending
If your mesh becomes too dense later, this guide about reducing geometry will help you clean it up.
Step 2: Add a Curve Path
Now create the path your object will follow.
- Press Shift + A
- Go to Curve → Path
Select the curve and start shaping it:
- Move points (G)
- Rotate (R)
- Scale (S)
Focus on building the exact shape you want your object to follow.
Step 3: Shape the Curve
Switch to Edit Mode on the curve and adjust the control points.
Take your time here.
This curve controls everything.
You can:
- Stretch it into arcs
- Create sharp turns
- Build complex shapes
Tip:
Keep it simple at first. You can always refine it later.
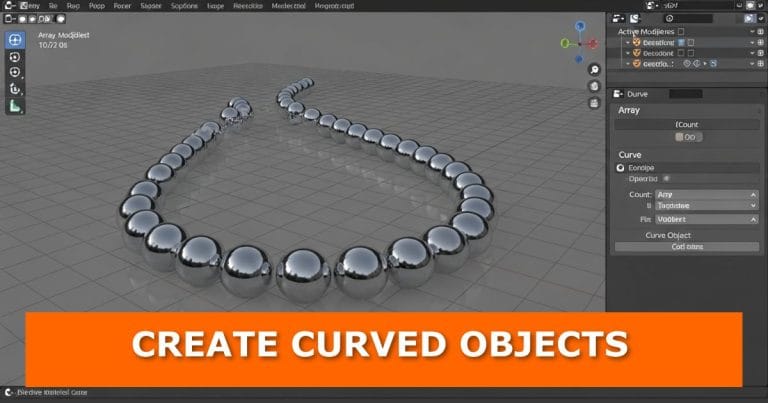
Step 4: Add an Array Modifier
Select your object (not the curve).
- Go to the Modifier tab
- Add an Array Modifier
Set the direction using Relative Offset:
- Usually along X or Y depending on your object orientation
This creates repeated segments that will follow your curve.
Key point:
The array builds the length of your object.
Step 5: Add the Curve Modifier
With the same object selected:
- Add a Curve Modifier
- Choose your curve as the target
Now your object will snap along the path.
If it doesn’t align correctly:
- Rotate the object
- Move it slightly until it matches the curve direction
This step often needs small adjustments.
Step 6: Increase the Array Count
Now extend your object along the curve.
- Go back to the Array Modifier
- Increase the Count
Your object will grow along the curve smoothly.
This is where everything comes together.
Common Fixes (If Something Looks Wrong)
- Object not following curve?
Check origin point and alignment - Twisted results?
Apply rotation with Ctrl + A → Rotation - Not smooth enough?
Add more loop cuts
Where You Can Use This Technique
This method is used in many scenarios:
- Pipes and cables
- Circular designs
- Mechanical parts and patterns
- Architectural elements
Once you master it, you’ll reuse it in almost every modelling project.
Quick Recap
- Start with a well-prepared mesh
- Add a curve path
- Shape the curve
- Use Array Modifier to build length
- Use Curve Modifier to bend the object
- Adjust count and alignment
Try It Yourself and Share Your Results
Open Blender and test this workflow on a simple object.
Then push it further:
- Create a spiral
- Build a cable system
- Design a curved structure
If you get stuck or something doesn’t work, drop your question in the comments. I’ll help you figure it out.
Keep Improving Your Blender Skills
If you want to build faster and cleaner models, explore more tutorials:
Don’t Miss What’s Next
Want more quick Blender techniques like this?
- Bookmark this post for updates
- Share it with someone learning Blender
- Explore more tutorials on the site
New guides are added regularly to help you work faster and smarter.


