How do I speed up Cycles render in Blender?
This is a challenge both Blender users and developers have been trying to overcome. Because slow render times can be a real productivity killer, especially when working on long 3D animation projects.
In this tutorial, we’re going to explore a comprehensive list of tips and tricks to optimize cycles render to speed up animation rendering in Blender. Implementing these tips can make your render times up to 2,000% faster! Let’s get started.
1. Enable GPU rendering to speed up Cycles render in Blender
GPU rendering allows you to use your graphics card instead of the CPU to render. Modern GPUs are built to handle a lot of number crunching, which can significantly speed up rendering. However, due to relatively limited memory, they have limitations in producing complex scenes, as well as interaction issues when using the same graphics card for display and rendering. It all depends on the graphics card you are using.
How to enable GPU rendering in Blender
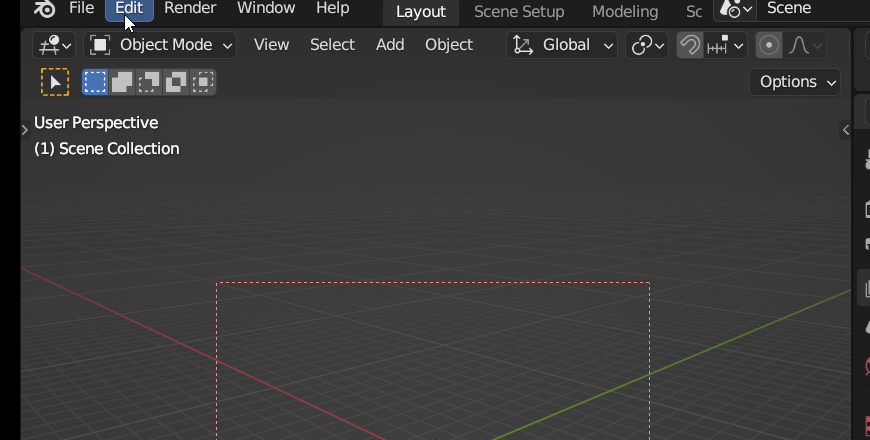
Go to Edit > Preferences > System.
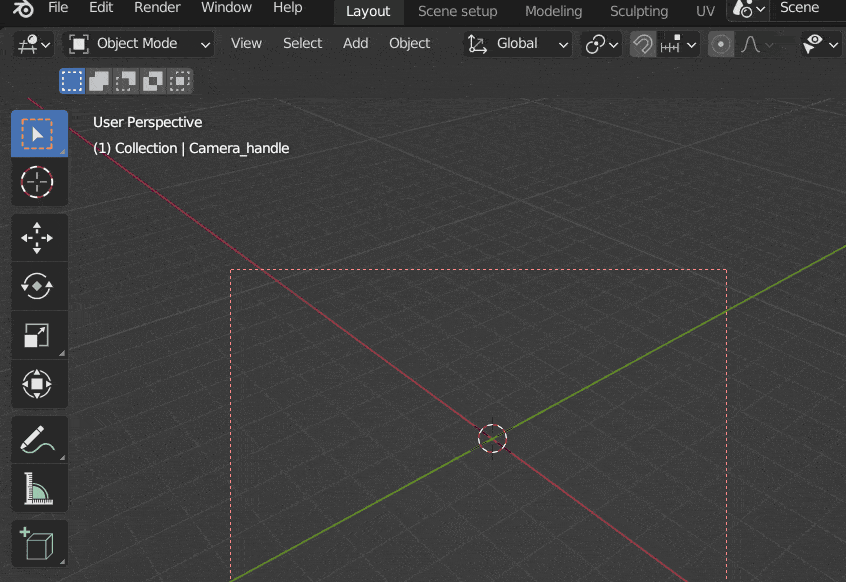
If you have an Nvidia graphics card, select either CUDA or Optix. If you have an AMD graphics card, select HIP. Then select your graphics card.
2. Optimize your Light Path settings to speed up Cycles render in Blender
Light bounces are Cycles engine’s way of simulating the natural properties of light and how it reacts, or bounces, on walls and other objects. It’s what helps the rendered scene look so realistic when compared to the viewport. The problem with realism is that it requires longer rendering times. Light bounces are one of the most significant causes of a slow render.
This is easily fixed by navigating to the Render Properties panel in Cycles and then to the Light Paths section. Turning down the Max Bounces total can quickly speed up rendering. The default setting is 12, but anywhere between 3 and 6 will give you the same amount of realism without overworking the GPU when it comes time to render.

You can fine-tune the lighting setup even further by adjusting the individual light path types, such as Glossy or Diffuse, which are also found in the Light Paths section. Transmission should not be changed too much because it will reduce the final render’s realistic quality.
3. Activate Blender’s Persistent Data
Here’s how it works: When you press the render button, the first frame of your scene is calculated and cached. The frames that follow rely on the cached data from the first frame. This can sometimes speed up your renders by up to 5 times. Because your scene’s elements are no longer calculated in every frame, as they were previously.
Limitations of Persistent Data
- Persistent data performs best in static scenes. Scenes in which no objects move. As an example, consider interior architectural rendering. As of now, the Persistent data feature does not support caching animated objects in the scene.
- Persistent data comes at the cost of increased memory usage.
How to activate Blender’s Persistent data to speed up Cycles render in Blender
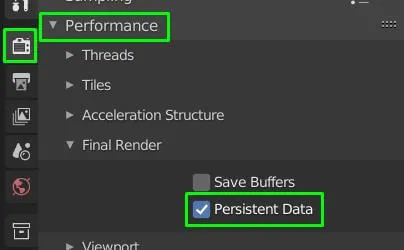
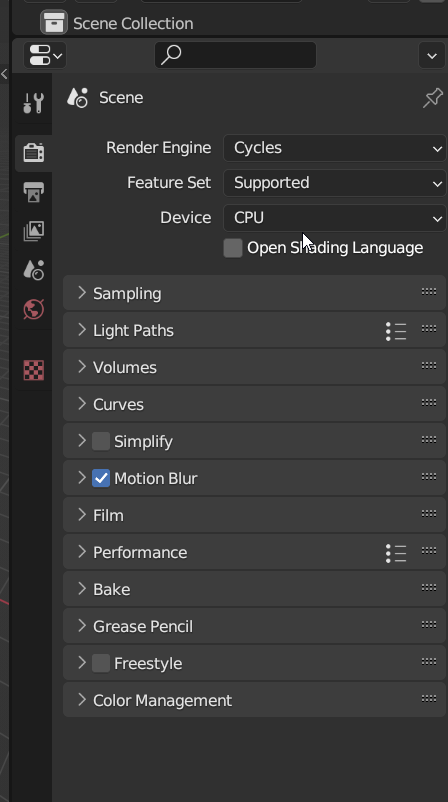
Under render properties, go to the Performance Tab then the subtab ‘Final Render’
4. Optimize your HDRI multi-importance sampling
When working with high-resolution HDR environments, Blender can become unresponsive when the HDRI is first loaded. This is due to the time required to create an important map that Cycles X needs to avoid fireflies during rendering. The importance map informs cycles about the bright areas of the HDRI so that it can favor those joined renderings and produce a better result.
How to optimize your HDRI multi-importance sampling to speed up Cycles render in Blender
Go to the World settings > Settings tab. Change the ‘Sampling’ setting from Auto to Manual. Now, adjust the ‘Map Resolution’ value as needed.
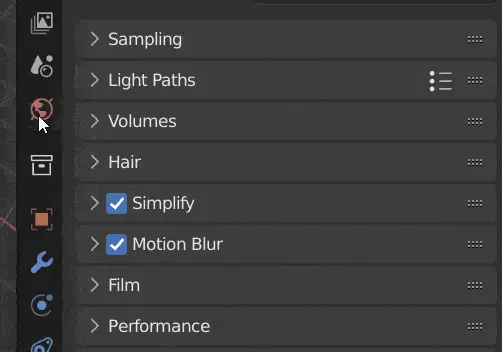
You simply need to set it high enough to avoid fireflies but low enough to prevent Blender from responding inaccurately. I’ve found that values 512 and 1024 work best for me.
5. Set a render region when working on shading or lighting of a single object
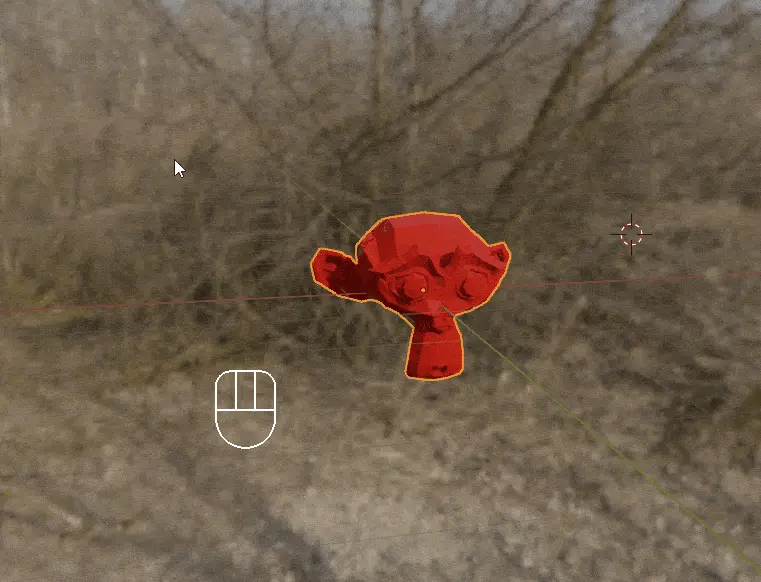
You can improve viewport rendering tremendously when doing shading or lighting a single object. Because cycles will concentrate all resources on the render region instead of the whole viewport. Since a selected render region is smaller than the viewport, cycles will render the region faster.
To select a render region, click Ctrl+B. Then with your mouse draw a box around the object you would like to view as rendered. Below is a .webp to help you select a render region in Blender.
6. Reduce your Cycles X sampling count
Sampling is a render setting in the Cycles X rendering engine. It is the number of light calculations Cycles X needs to do, to render a scene. The higher the sample count, the more accurate light calculations will be. The higher the sample count, the cleaner your render will be. Unfortunately, the higher the sample count, the longer your render time will be.
More samples are generally good. But there comes the point where more samples do almost nothing. Therefore, it is important to do test renders to come up with the sample count that will reduce your render time at the same time produce clean renders.
In Blender 3, you can set Noise Threshold, Max Samples, Min Samples, and Time limit. To set the sample count, go to Render Properties > Sampling > Render.

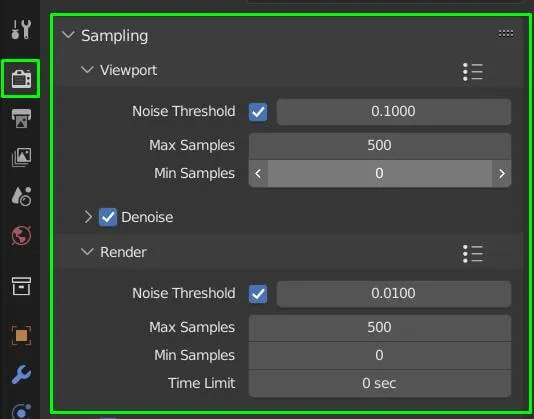
For Noise Threshold, Min Samples, and Time Limit values, leave them as default. Adjust the Max Samples value from around 500 samples adjusting upwards until you are satisfied with the quality of the render. If you are looking for ways you can reduce render times in Blender 2.93 and below, visit ‘How to speed up cycles render in Blender‘
7. Changing your file output format will speed up Cycles render in Blender by up to 15 %
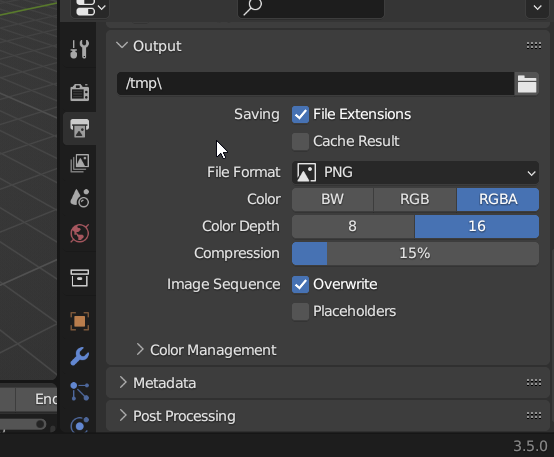
Surprisingly, changing your render output format from PNG to either TIFF or OpenEXR can significantly speed up Blender’s rendering process. Blender saves TIFF and OpenEXR faster than PNG files. Making this simple switch can save you hours on longer animation renders.
To switch your output format, go to the Output Properties panel > Output tab. Under the File Format dropdown, switch from PNG to either TIFF or OpenEXR.
8. Use Temporal Denoising
Temporal denoising is a hidden gem in Blender. It reduces noise across frames by considering the color of each pixel in relation to time. This technique can result in cleaner animations and lower required sample rates, ultimately saving you time and resources.
To set Temporal Denoising:
- Go to Render Properties panel > Sampling tab.
- Ensure Denoise is checked on. Select Optix denoising as your denoising engine.
- Set Passes to Albedo and Normal.
- Go to the Output Properties Panel. Switch your File Format to OpenEXR multi-layer.
- Go to the Color Management tab and set Color Space to whatever you are working in.
- Go to View Layer Properties tab > Passes tab. Under Data, ensure ‘Combined, Vector and Denoising Data’ are checked on.
- Then go to Edit > Preferences > Interface. Enable Developer Extras.
- Go ahead and render your animation.
- After rendering, you’ll have a series of EXR files.
- Use the search bar to find and execute the denoise animation operator (only available if you enabled developer extras).
- Blender will apply temporal denoising to your frames, significantly reducing the noise.
- Check the console for the message “denoising completed” to confirm the process.
- Review your animation, and you’ll notice a smoother, less noisy result.
9. Subdivision Dicing Rate
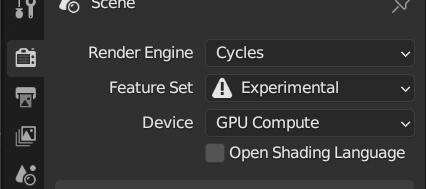
To use Subdivision Dicing, first go to Render Properties and activate Experimental under Feature Set.
Still, in the Render Properties panel, go down to the Subdivision tab.
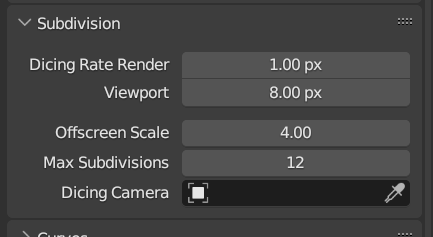
Adjust the subdivision dicing rate to fine-tune the level of detail in your renders. Lower values increase detail and render time, while higher values reduce detail and render time. Match this rate to your viewport settings for efficient rendering.
10. Use Fast GI Approximation
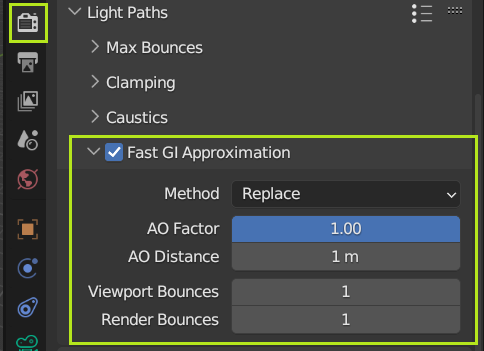
Enable “Fast GI Approximation” under Light Paths to speed up Global Illumination calculations while maintaining visually pleasing results. You can often achieve a 20% increase in render speed with minimal quality loss.
11. Animated Seed
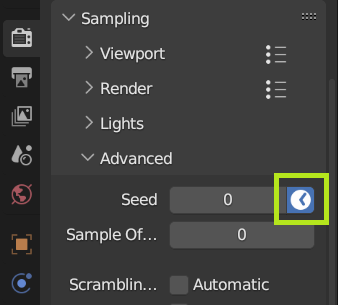
Click on the clock icon in the seed setting under Advanced Sampling to introduce variability in noise patterns from frame to frame. This creates a more natural look while reducing the appearance of static noise in your renders.
12. Filter Glossy
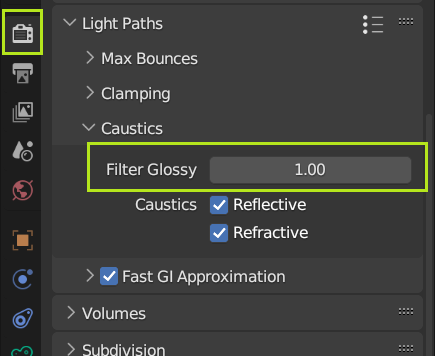
Under Light Paths, increase the “Filter Glossy” setting to smooth out noise in glossy materials, further lowering the required sample rates and speeding up your renders. It has been observed that Filter Glossy speeds up Cycles render by up to 5%.
13. Optimize Displacement Maps
Use vertex groups to limit displacement mapping to specific areas of your objects, reducing the computational load and speeding up rendering.
14. Texture Atlases
For repeating textures, consider using texture atlases instead of unique textures for each instance. This can significantly reduce memory usage and rendering time.
15. Image Projection
In complex environments, use image projection to render lower-poly geometry with images projected onto it to simulate detail. This can save render time without sacrificing quality. Using image projection as opposed to geometry can speed up Cycles render in Blender by up to 800%.
16. Spotlight Lamps
In some cases, Spotlight lamps may render faster than area lamps due to their controlled and focused light distribution. Experiment with different light sources to optimize render times.
17. Optimize Volumes
Lower the step rate and resolution in the Volumes tab under the Render Properties panel to speed up volumetric rendering, especially in scenes where minor quality reductions are acceptable.
18. Decimate Background Objects
Simplify your scene by decimating background objects with tools like Decimate modifier or Reduce Geometry. Reducing object complexity can lead to substantial render time improvements. This can speed up Cycles render in Blender by up to 700%.
19. Optimize Texture Sizes
Ensure your texture sizes are appropriate for their use. Avoid unnecessarily large textures, as they can slow down renders and consume more memory than needed.
20. Use Object Instancing
Instance objects instead of duplicating them to reduce memory usage and accelerate renders. Try Alt + D for object instances and explore collection instances for even more efficiency. Object Instancing has been observed to speed up Cycles render in Blender by up to 800%.
21. Utilize the Simplify Option
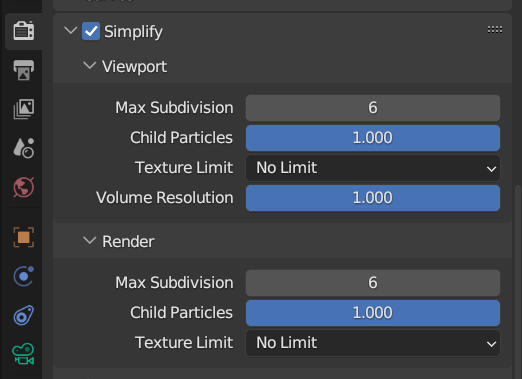
The Simplify option in Blender allows you to globally reduce scene complexity, including particles, texture sizes, and subdivisions, resulting in faster rendering.
22. Camera Culling
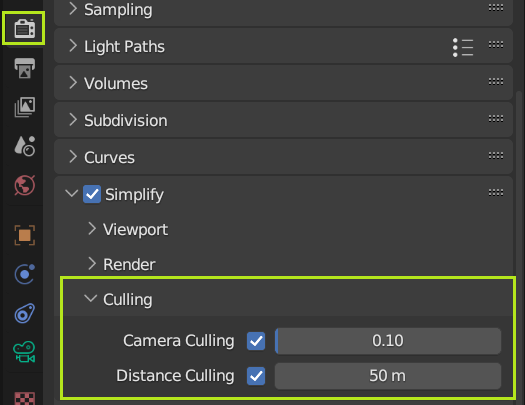
Enable camera culling under the Simplify menu to remove objects outside of the camera’s view or a specified distance. This can drastically reduce render times for large scenes.
23. Limit Particle Lifetime
Adjust particle lifetimes to minimize excess particles that may not be crucial to your scene. This reduction can lead to faster renders.
24. Use Automatic Scrambling Distance

Enable automatic scrambling distance to adapt scrambling strength based on the sample count, potentially improving GPU rendering performance.
25. Pre-rendered Image Sequences
Consider using pre-rendered image sequences for certain effects, especially when exact detail isn’t required. This can save significant rendering time. This will speed up Cycles render in Blender by up to 1000% depending on your project.
26. Bump Maps Instead of Displacement
Utilize bump maps instead of displacement maps when possible to reduce memory usage and speed up rendering without sacrificing visual quality.
27. Mist Pass for Fog
Create a foggy effect by using the Mist pass in combination with a color ramp. Adjusting the black and white values can control the intensity of the mist.
28. Multi-Resolution Modifier
Employ the Multi-Resolution modifier to create high-resolution details while keeping the original mesh low-poly. This technique is excellent for adding detail to objects without overburdening your system.
29. Ren Threshold
Use the Ren Threshold option in the output properties to set a noise threshold for your final render. This can optimize render times by stopping the render when noise reaches an acceptable level.
30. Custom GPU Tile Sizing
For GPU rendering, set custom tile sizes in the performance settings. Leave CPU rendering on auto-detect, render at lower resolutions, and use AI upscaling for quicker results.
31. Turbo Tools Add-On
Install the Turbo Tools add-on to automatically optimize scene settings for faster render performance. This add-on can significantly speed up your workflow.
32. Reuse Image Data
Utilize images for memory and data reuse across frames in animations. This reduces the need for recalculations and can lead to substantial time savings.
33. Open Shading Language (OSL) Shaders
Explore OSL shaders to optimize your rendering process. You can code custom nodes for precise control and improved rendering efficiency.
34. Ray Visibility
Disable unnecessary ray visibility for objects to reduce calculations. Objects that don’t need to interact with specific rays can be hidden, optimizing rendering without affecting the visuals.


