7 Blender Camera Hacks Every Animator Should Know
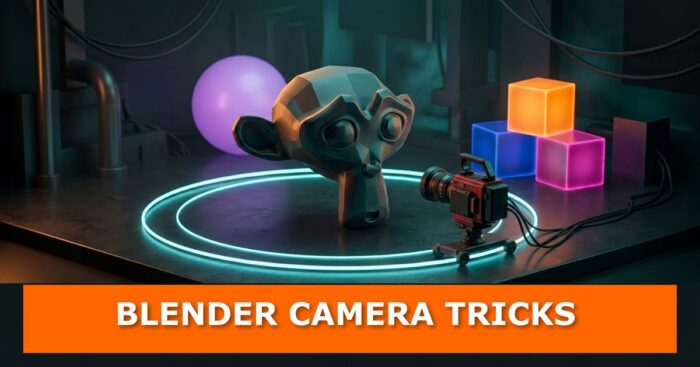
You can make a Blender camera follow an object, orbit it, change perspective, shift focus and cut between angles using only built-in tools: constraints, keyframes, camera settings and timeline markers. All seven techniques below work with a few basic objects, and none of them needs an add-on.
Most of us park the camera, frame the shot and hit render. That is like buying a sports car and using it as a garden shed. Let’s get it moving.
If you want to go deeper after this, the best Blender camera add-ons are worth a look, and AI tools are now creeping into this part of the pipeline too, as you’ll see in how Claude ran a full Blender and ComfyUI pipeline solo.
1. Camera Tracking: Let Blender Do the Aiming
Normally you keep correcting the camera’s rotation as you move it. A Track To constraint does that for you.
- Select the camera and open the Object Constraints tab.
- Add a Track To constraint.
- Use the target eyedropper to pick your subject (Suzanne, in the demo).
- Set Track Axis to -Z and Up to Y.
- Press G, then X, and slide the camera sideways.
- The background objects slide across the frame.
- Suzanne stays centered because the camera keeps turning toward her.
It also works in reverse: move Suzanne and the camera follows without you touching its rotation.
- The camera aims at the object’s origin.
- For precise control over where it looks, use an empty as the target and move that instead.
Need a quick refresher on aiming? See the quickest way to point a camera in Blender. And if you want more than one target, try making your camera follow two paths at once.
2. Orbit Shots With Two Keyframes
Use the same tracking setup to show a model from every angle without rotating the model.
- Select Suzanne, press Shift + S and choose Cursor to Selected.
- Add a Plain Axes empty, press F2 and rename it to orbit.
- Select the camera, then Ctrl + click the empty in the Outliner.
- Press Ctrl + P and choose Object (Keep Transform).
- Select only the empty and make sure the pivot is set to Median Point.
- Press R, then Z, and rotate. The camera circles Suzanne while the constraint keeps it aimed at her.
- Right-click to cancel the test rotation.
To animate it:
- At frame 1, open the Item panel, hover over the rotation values and press I.
- Go to frame 120 and rotate the empty around Z to a new angle.
- Hover over rotation and press I again.
That is the whole camera move. A short arc gives a slow reveal, a wide arc shows more of the model. Put a few objects in the background so you can actually see the movement. For another take, read how to orbit a camera around an object in Blender.
3. Dolly Zoom: Warp the Background
A dolly zoom keeps your subject roughly the same size while the space behind it appears to change. Set up a sphere in front of a doorway with a few objects at different distances.
- Select the camera and open Camera Data properties. Start with a 50 mm focal length.
- At frame 1, hover over Location in the Item panel and press I. Hover over Focal Length and press I too.
- Go to frame 120. With your mouse over the viewport, press G, then Z twice, and pull the camera back until the sphere looks noticeably smaller.
- Increase the focal length until the sphere matches its original size. Use its top and bottom edges as a reference.
- Insert keyframes on both location and focal length.
Scrub the timeline and the doorway and background objects seem to rush toward you, yet nothing in the scene moved. The camera position changes how big objects look relative to each other, and the lens keeps your subject steady. If the sphere drifts in size, adjust the final focal length and replace that keyframe.
4. Focus Pull: Steer Attention Without Moving
You can guide the viewer’s eye without touching the camera. The demo has a sphere near the camera and a cube further back.
- Place an empty at the front of the sphere and name it focus.
- Select the camera, open Camera Data and enable Depth of Field.
- Pick the focus empty with the Focus Object eyedropper.
- Lower the f-stop until the cube is clearly blurred while the sphere stays sharp.
- A lower f-stop means a shallower depth of field, so the blur is easier to see.
- Select the focus empty. At frame 1, hover over Location and press I.
- Go to frame 60, press G, then Y, and push the empty toward the back until the cube’s front edges look sharp.
- Insert another location keyframe.
Scrub through and the sphere softens as the cube sharpens. Both objects sit still, but the viewer’s attention travels.
5. Lens Shift: Keep Buildings Straight
Tilt a camera up at a tall building and the sides lean toward each other. Lens shift lets you include the top while keeping the lines parallel.
- Level the camera. In this scene, set X Rotation to 90 degrees and leave Y and Z at zero.
- The edges are upright now, but the tops of the buildings are cropped out.
- Open Camera Data and find the Shift settings.
- Increase Shift Y until the tops return to the frame.
The vertical edges stay upright because the camera never tilted. You only shifted which part of the view lands in the image.
6. Orthographic Views: Diagram Mode
Want a clean, illustration-style view instead of a normal perspective? Change one setting.
- Select the camera and open Camera Data.
- Switch Type from Perspective to Orthographic.
- Adjust Orthographic Scale until your subject fits (three blocks arranged as steps, in the demo).
Parallel edges now stay parallel instead of converging into the distance, giving that flat, diagram-like look while you can still see tops and sides.
- Moving the camera backward no longer changes the subject’s size on screen.
- Use Orthographic Scale to frame the shot instead: lower is tighter, higher shows more of the scene.
7. Camera Cuts With Timeline Markers
Blender can switch between cameras during an animation. The demo uses two cameras named wide and close.
- Go to frame 1 and select wide in the Outliner.
- Hover over the Timeline, press M to add a marker, then press Ctrl + B to bind the camera to it.
- Go to frame 60 and select close.
- Press M again, make sure only the new marker is selected, and press Ctrl + B.
Keep your mouse over the timeline for that shortcut, because Ctrl + B in the 3D viewport does something different.
Play from the start and Blender cuts from wide to close at the second marker. To change the timing, select the marker and press G to slide it. Add as many cameras as you like. If cuts are new to you, here is how to make a camera the active one in Blender.
Quick FAQ
Why does my tracked camera look at the wrong spot? The Track To constraint aims at the target’s origin. Use an empty as the target if you want to control the exact point.
Does the dolly zoom need both location and focal length keyframes? Yes. Animate both, otherwise the subject changes size and the effect is lost.
Can I use these tricks together? Absolutely. Combine an orbit rig with a focus pull, or use orthographic cameras in your cut sequence.
Will motion look smoother with blur? Often, yes. Check how to use motion blur in Blender before you render, then see how to render an animation as video.
Action! Now Go Break Some Cameras
Pick one technique and try it on a scene you already have. Start with the orbit, since it needs only two keyframes, then layer on a focus pull. Pair it with some Blender lighting secrets and your renders will look far more cinematic.
AI is also changing how fast we block out and finish scenes, as covered in blocking in Blender and finishing with AI and our roundup of AI add-ons for Blender. Camera skills still matter, because AI can only polish a shot you framed well.
Which of the seven was new to you? Drop a comment with your favorite and share what you build.

What do you think?
Join the Conversation