This 6GB VRAM Setup Builds Game-Ready Characters With Free AI
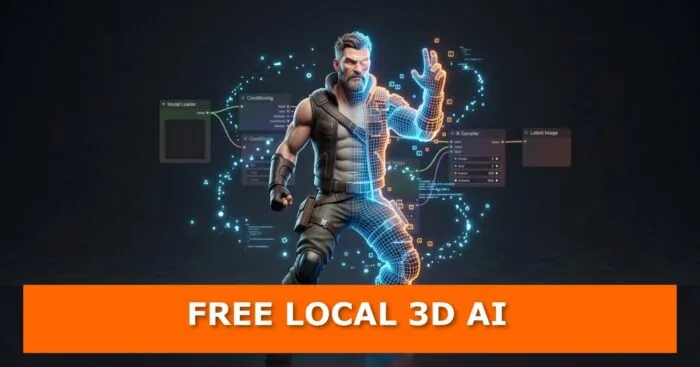
Yes, you can now take a single photo, run it through three free local AI tools, and end up with a fully rigged, game-ready 3D character walking around in Unreal Engine — and your graphics card only needs 6GB of VRAM to pull it off.
That’s not a typo, and it’s not a cloud-subscription sales pitch either. YouTuber Philip from Pixel Artistry just published a full walkthrough of a completely local, completely free AI-to-3D pipeline that goes further than almost anything we’ve seen in this space: image generation, mesh creation, retopology, texturing, rigging, and a final import into Unreal Engine, all running on consumer hardware. No render farm. No monthly fee. Just your own GPU quietly doing the work of an entire small studio.
Why This Pipeline Is a Bigger Deal Than It Sounds
Most AI-to-3D workflows stop at “here’s your raw mesh, good luck.” You get a lumpy, untextured blob and you’re on your own for everything after that — retopology, UVs, texturing, rigging. It’s a demo, not a deliverable.
This one refuses to stop early. It walks the entire production chain, the same one we mapped out when one photo turned into a full 3D world, except this time the target isn’t a static scene — it’s a playable character with a skeleton, a weapon socket, and a spot on the roster. If you’ve been following the wave of low-VRAM breakthroughs, including how NVIDIA Ardy made real-time AI animation possible on a 6GB card, you’ll notice a pattern: 2026 is the year “I don’t have a $2,000 GPU” stopped being an excuse.
A quick heads-up before you dive in: this workflow currently leans on NVIDIA GPUs. Philip hasn’t found a working AMD path for Trellis 2 yet, so if you crack that puzzle, the comments section wants to hear from you.
What You Need Before You Start
- ComfyUI — installed via the ComfyUI Easy Install package (Philip recommends the version built by IVO)
- An NVIDIA GPU with at least 6GB of VRAM
- Blender, for cleanup, remeshing, and assembly
- Unreal Engine 5, for the final playable result
- Trellis 2 and Pixal3D, installed through the linked Pixel Artistry ComfyUI setup guide
- The workflow JSON files and installer packages from the video’s shared drive folder, including the texture projection installer and the SkinTokens installer
Once ComfyUI is running, drop all the add-on installers into the add-ons folder, run them, and restart. From there, every workflow in this pipeline is just a matter of loading the right JSON file and pointing it at your files.
Step 1: Design Your Character
Open the character design and part-creation workflow and you’ll find Krea 2 Turbo on one side, generating your base character concept, and the one-node Flux.2 Klein setup on the other, waiting for the editing stage.
- Write a detailed prompt — something like a front-view, full-body, game-ready 3D character concept in a realistic style — and refine it with a chatbot first so ComfyUI has as much specificity as possible
- Prefer a character reference sheet instead? Switch to a 16:9 widescreen ratio (not square) to fit a front, side, and back view in one generation
- Hit generate and wait for your base character art
Step 2: Convert Your Character to an A-Pose
Before anything can be split into parts, your character needs its arms out of the way. This is where Flux.2 Klein comes in.
- Check the model settings first: you’ll need the Flux.2 Klein 9B safetensors file (the FP8 mixed version), the Flux.2 VAE safetensors file, and the Flux.2 Klein 9B Separation LoRA
- Prompt something like “change him in a pose, arms spread apart” — a vague “change his pose” alone tends to produce results you don’t want
- Regenerate until you get a clean A-pose without any accessories still attached
Step 3: Separate the Character Into Parts
This is where the Separation LoRA earns its keep. Upload your A-pose image, then prompt it to isolate one part at a time — for example, “separate the head from the character onto a white background.”
- Regenerate as needed; results vary slightly each time, so it’s worth trying a few passes until you land on a clean isolation
- Repeat the process for every major part: head, armor, limbs, and any accessories
- Each isolated part becomes its own source image for the next stage, which is exactly why this step pays off later — more detail per part means a sharper final mesh
Step 4: Generate 3D Meshes With Trellis 2 and Pixal3D
Now the actual 3D generation begins, using the mesh pipeline workflow. If ComfyUI flags missing custom nodes, use the Manager to install them and restart before continuing.
- Download the specific LoRAs and models flagged in the workflow’s red-highlighted areas
- Upload one of your separated part images (the head is a good starting point)
- Choose your model format: Q8 if your GPU can handle it, Q4 or Q5 if you’re working with the minimum 6GB of VRAM
- The built-in group-muter node lets you toggle Pixal3D and Trellis 2 on and off independently, so you can generate the same part with both and compare results side by side
Philip found Pixal3D tends to handle hats and hard-surface details better, while Trellis 2 pulled ahead on fine detail for the armor in his test. There’s no universal winner — that’s the whole point of having both in one workflow. Run each part through whichever tool gives you the cleanest result.
Step 5: Texture the Mesh
Enable the mesh texturing pipeline section, upload the path to your freshly generated model from the ComfyUI output folder (strip out any stray quotation marks), and run it.
- This step automatically UV unwraps the mesh for you — no manual unwrapping required, which is a genuine timesaver if you’ve ever fought with a UV editor
- The result gives you a solid base texture straight away, one you can refine further or bake onto a cleaner mesh later
Step 6: Multiview Projection and Texture Baking
For a noticeably better texture than the basic pass, switch to the multiview projection and baking section. It projects texture from multiple camera angles onto your mesh and blends the results together.
- Upload your mesh path again
- Adjust the prompt to match the specific part you’re texturing
- Double-check you’re using the correct mix settings, or you’ll end up with a muddy result
- Tweak the camera elevation angles if you want more control over how each projection angle lines up
This is the same principle behind re-texturing a Blender scene without re-rendering — reusing geometry and reworking the surface instead of starting from zero.
Step 7: Retopologize With AutoRemesher
Raw AI meshes are rarely clean, so this step runs everything through AutoRemesher, a free and open-source retopology tool. Philip is upfront that free, local retopology options are thin on the ground right now — a gap we flagged when covering the other things that just changed in 3D, including free retopology.
- Merge vertices and clean up non-manifold edges and faces before feeding the mesh into AutoRemesher
- Point ComfyUI’s file path setting to your downloaded AutoRemesher .x file
- Expect some holes on certain models; results are inconsistent, so treat this as a first pass, not a final one
Prefer working in Blender? Install the AutoRemesher Blender add-on instead:
- Download the add-on zip from its GitHub releases page
- In Blender, go to Edit, then Preferences, then Add-ons, and install from disk
- Point the executable path to the same .x file you used in ComfyUI
- Merge vertices by distance in Edit Mode first
- Apply a Voxel Remesh at roughly 0.002 in the Modifier tab
- Run AutoRemesh with an adaptivity setting around 0.1
The result won’t be flawless topology, but it’s a meaningful step up from the raw AI mesh, and it’s easy to touch up individual edge loops afterward. If retopology addons are your thing, our roundup of the best Blender addons for retopology is worth a look for paid alternatives that go further.
Want higher quality and don’t mind paying? Quad Remesher runs locally for a $19 perpetual license or a subscription, while cloud options like Hunyuan3D Studio and Tripo’s newer P2.0 model push topology quality even further — Philip specifically calls Tripo’s smart topology result the best auto-topology he’s seen to date.
Step 8: Bake the High-Poly Texture Onto Your Low-Poly Mesh
Export your retopologized mesh from Blender as a GLB file, making sure “selected objects” is checked on export or the next step won’t line up correctly.
- Upload the high-poly, textured mesh and the low-poly retopologized version into the baking workflow
- Optionally enable roughness and metallic map baking alongside the base color
- Run the workflow — it transfers the detailed texture from the high-poly version onto your clean low-poly mesh
- Keep the object in its exact original position during export; any shift breaks the projection
Step 9: Assemble the Character in Blender
Repeat steps 4 through 8 for every part of your character — head, armor, limbs, and accessories — then bring them all into a single Blender file and arrange them into a complete character.
Step 10: Rig the Character With SkinTokens
Select every part of your assembled character and merge it with Ctrl+J, then export the whole thing as an FBX.
- Load the SkinTokens workflow in ComfyUI
- Upload your exported model (GLB is the recommended format, though FBX also works)
- Leave the defaults as they are, and make sure Unreal Engine 5 is selected as the target
- Check the ComfyUI terminal to confirm the export succeeded, even if the preview doesn’t show up right away
Open the result in Blender to confirm the bone structure looks right before moving on. If you’re the type who likes to layer in extra motion afterward, this is also a natural point to bring in tools from our guide on AI-powered motion capture, or to blend in existing animation sets the way we covered in combining and blending Mixamo animations in Blender.
Step 11: Import Into Unreal Engine 5 and Bring It to Life
The final stretch: import your rigged character into Unreal Engine’s third-person template with all textures attached.
- Create a control rig for the imported skeleton
- Retarget it to the default playable Unreal Engine character
- Fix scaling and bone structure discrepancies as they come up
- Build a blueprint and attach the animations you want the character to use
- Swap the retargeted character into the third-person template
- Press play
Want your character armed? Constrain a weapon to the correct hand socket and bone structure, and it’ll move naturally with the rest of the rig — sword included.
Where AI Fits Into All of This
What makes this pipeline notable isn’t any single tool — it’s how many separate AI systems are now chained together into one coherent production line, running entirely on a local machine. Image generation, mesh generation, retopology, texturing, and rigging each used to be its own specialized (often expensive) discipline. Now they’re stitched into a single ComfyUI session. It’s the same direction we saw play out when an AI agent ran an entire Blender and ComfyUI pipeline solo — the tools aren’t just assisting individual steps anymore, they’re capable of owning entire workflows end to end. Combine that with free AI-assisted rendering, like we covered in rendering Blender animations with AI for free, and the amount of a game production pipeline a single indie creator can now realistically own from their bedroom is genuinely wild.
Watch the Full Walkthrough
Every click, every prompt, and every model swap covered above is demonstrated live in the source video. If you want to follow along in real time rather than piecing it together from steps, this is the one to have open in a second tab while you work.

Try It, Then Tell Us How It Went
This pipeline has a lot of moving parts, but that’s kind of the appeal — every stage is swappable, tweakable, and free to experiment with. Start with a single head model, get comfortable with the LoRA-driven separation trick, and build outward from there.
Have you run Trellis 2 or Pixal3D on your own machine yet? Got an AMD workaround Philip hasn’t found? Drop a comment and let us know how your character turned out — and if you’re chasing that next level of polish, check out our tips on Blender lighting to make your finished character actually look as good in a render as it does in-game. Subscribe to stay ahead of the next local AI breakthrough, because at this rate, there’s a new one every month.

What do you think?
Write a comment…