
You Can Now Turn One Photo Into a Full 3D World, Free and Local
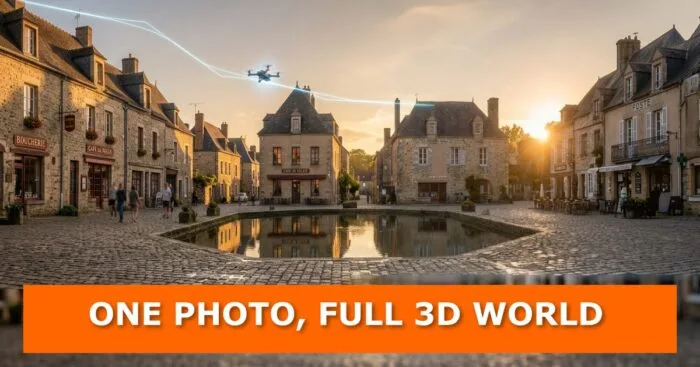
Yes, one image is genuinely enough now: feed a single photo into a free, local ComfyUI pipeline built around an open research model called Matrix-3D, and it will hallucinate an entire explorable 3D Gaussian-splat environment around it, complete with reflections, no subscription, and no cloud render farm required.
That sentence would have sounded like science fiction a year ago. But it’s exactly what the creator behind the YouTube channel Mickmumpitz just pulled off, after weeks of dead ends, failed research papers, and one very literal virtual drone. If you’ve been keeping an eye on how fast things are changing in the 3D world, this might be the wildest development yet, and we’re breaking down exactly how it works and how you can run it yourself.
Why “Just Generate a 3D World” Turned Out to Be Really Hard
Here’s the thing about AI in 2026: text-to-image is basically solved, video generation is improving weekly, but asking a computer to turn one flat photo into a fully walkable 3D space is a different beast entirely. It sounds like it should be a solved problem by now, and yet the creator ended up spending weeks building a custom pipeline in ComfyUI just to get it working reliably.
The obsession isn’t new, either. Three years ago, the same creator hacked together a rough version of this idea: generate a 360-degree image, project it onto a sphere, estimate depth, and distort the sphere into a crude environment. Clumsy, but it worked well enough to ground a scene, which matters a lot if you’re doing virtual production, previsualizing an AI-generated movie, or just blocking out a Blender scene with stand-in characters before committing to a full build.
Gaussian Splats, Explained Without the Headache
Before going further, it helps to understand what everyone in this space is actually building toward: Gaussian splats.
Traditional photogrammetry takes hundreds or thousands of photos, calculates camera positions, and builds a polygon mesh out of the result. That works fine for walls and hard surfaces, but it falls apart on hair, foliage, glass, and anything reflective. Gaussian splatting throws polygons out entirely. Instead, a scene becomes a cloud of millions of tiny, semi-transparent 3D blobs (technically called ellipsoids), each one storing a position, size, rotation, and opacity. Color and brightness shift depending on the viewing angle, thanks to a bit of math called spherical harmonics, which is exactly why splats can fake specular highlights and refraction that a polygon mesh simply can’t. And because there’s no ray tracing or shader math involved, splats render in real time, even on a phone.
Training a splat normally means an optimizer grinding through every camera angle in a dataset until the blobs line up. That takes time. Which is what made Apple’s December 2025 research paper such a big deal.
The Apple Curveball: SHARP
Apple’s paper, titled Sharp Monocular View Synthesis in Less Than a Second, does exactly what it says. Feed it a single photograph, and a neural network regresses a full 3D Gaussian representation of the scene in one feedforward pass, in under a second on a standard GPU. It’s metric too, meaning it preserves real-world scale rather than a wobbly guess. Apple’s own benchmarks show it cutting perceptual error by 25 to 34 percent over the previous best model while slashing generation time by three orders of magnitude.
There’s just one catch: SHARP only reconstructs the view from a single vantage point. It’s brilliant for “here’s a photo, now let me look around it a little,” but it doesn’t give you a full 360-degree environment you can walk through. So the obvious next move was to slice a 360-degree panorama into individual views, run SHARP on each slice, and stitch them back together.
It did not go smoothly. Every slice generated independently, which meant ugly, visible seams everywhere the pieces met.
The Dead Ends Nobody Talks About
What followed was genuinely a research crawl through nearly every competing approach out there, and it’s worth walking through because most of these tools rarely get this kind of honest, side-by-side comparison:
- A depth-guided fix using Mogi (Moge) to align the individual SHARP views before stitching. Promising at first, but the reconstructed scene fell apart the moment the camera moved away from its starting position, since SHARP is built to preserve a scene rather than invent new detail as you move through it.
- UniSarp, a research project from Insta360 aimed at the same problem for full 360-degree worlds. Fast, but the world falls apart quickly once you start exploring past the initial frame. Worth trying just for the novelty (there’s a Hugging Face demo), but not production-ready.
- HunyuanWorld 2.0, Tencent’s world-model system, which looked genuinely strong on paper but demands two massive models loaded simultaneously, effectively requiring a four-GPU setup. Not exactly a homelab build.
- NVIDIA Lyra, which actually got up and running, but ships with roughly 91GB of checkpoints, is Linux-only, and took six minutes just to boot on the first run. Powerful, but nowhere near consumer-hardware territory, especially compared to workflows that now run real-time AI animation on a 6GB graphics card.
Every single one of these got ruled out for the same reason: they either weren’t flexible enough to explore, weren’t licensed permissively enough for small studios and solo artists to build commercial work on top of, or simply couldn’t run on hardware a normal person owns.
Enter Matrix-3D (Not the PS2 Game)
The solution that actually stuck came from Skywork AI’s Matrix-3D, a research project that takes a genuinely clever two-step approach. First, it takes a single 360-degree panorama, estimates its depth, and converts it into a rough 3D mesh. Move a virtual camera through that mesh and, unsurprisingly, it breaks apart wherever the original photo couldn’t see. Anything outside the original frame becomes a gaping black hole.
That’s where things get interesting. The broken footage gets fed into the Wan 2.1 video model, which hallucinates everything that’s missing. Skywork’s team pulled off two smart moves here. First, they blended real 3D geometry with intelligent inpainting to maximize visual consistency rather than letting the model invent from scratch. Second, instead of training an entirely new model from zero, they trained a lightweight LoRA on top of the existing Wan 2.1 video model.
Training that LoRA required a massive dataset of 360-degree video with precise camera tracking along custom flight paths, and since nothing like that existed, Skywork’s team built it themselves: they programmed a virtual 360-degree drone inside Unreal Engine 5 and flew it autonomously through 500 different video game environments hundreds of thousands of times. The result is a model that, given any custom camera path, generates a convincing 360-degree video following that exact route. Oddly, despite dropping back in August 2025, almost nobody built a usable, accessible workflow around it. That gap is exactly what this new ComfyUI pipeline fills.
Fixing the Resolution Problem
Getting Matrix-3D working inside ComfyUI wasn’t plug-and-play. The LoRA didn’t match ComfyUI’s expected format, which meant building custom nodes just to get it to load, though pairing it with a Lightx2v speed-up model afterward dramatically cut render times. A custom path editor was also built on top, giving a top-down and side view of the scene so you can pilot the virtual drone yourself, including the genuinely fun option of flying straight through a wall and watching the model invent a brand-new space on the other side.
The catch: Wan 2.1 tops out at 720p, which is rough when that resolution gets stretched across a full 360-degree field of view. The first fix attempted was upscaling every view with SeedVR. It helped a little, but it was painfully slow and the improvement was minor.
The real breakthrough came from studying Marble by World Labs, a closed-source competitor that produces sharp results fast, though within a much smaller explorable area and without working reflections. That sparked the winning idea: since every generated drone shot starts from the same position, and a high-quality version of that starting image already exists, why not reproject the original high-resolution photo back onto the 360-degree video? With known camera data and 3D geometry in hand, it’s possible to calculate exactly how every pixel should move, which is essentially the same trick behind learning to re-texture a Blender scene without re-rendering it. The payoff was dramatic: smoother transitions between the sharp original image and the AI-generated surroundings, and a noticeably sharper final result overall.
How to Actually Run This Yourself
Here’s the step-by-step breakdown for running the full pipeline on your own machine, assuming you already have ComfyUI installed.
Step 1: Generate or Source Your 360-Degree Starting Image
- Download a real 360-degree photo from a site like Polyhaven, or shoot one yourself with a 360 camera.
- Or generate one entirely with AI using the free panorama-generation ComfyUI workflow built for this project.
- Drag and drop the workflow into ComfyUI and install any missing custom nodes it flags.
- Download the required models, using the download links and folder placement notes attached directly to the model-loader nodes in the workflow.
Step 2: Create the Panorama (Text Prompt or Image Upload)
- If generating from text, leave the trigger caption for the custom 360-degree LoRA in place, then add your own scene description and hit run.
- The workflow first generates the base image, then automatically fixes the seam where the panorama wraps around, then upscales the result. Simple upscale prompts (like “high resolution photography”) tend to outperform overly detailed ones.
- If you’d rather start from your own photo, flip the workflow mode to false, upload your image, and the pipeline will distort it to match a 360-degree lens projection before placing it on a green background for the next model to build around.
- Describe the surrounding environment you want generated, and the model fills in everything outside your original photo while preserving the center exactly as you shot it.
Step 3: Set Up the Synthetic Dataset Workflow
- Drag and drop the second workflow (dataset creation) into ComfyUI, install any missing custom nodes (SplatKit and MoGe/Mogi nodes especially), and download the required models into the correct folders.
- Upload your finished panorama and set an output folder for the project.
- Click “compute geometry” to get a top-down and side preview of your scene, along with a marker showing your drone’s starting position.
Step 4: Fly Your Virtual Drone
- Choose between “look forward” mode, where the camera always faces the direction of travel (similar in spirit to how you’d orbit a camera around an object in Blender), or “per point look” mode, which lets you aim the camera independently at each waypoint.
- Plot multiple flight paths through different parts of your scene, adjusting height and direction as needed. If you’re familiar with getting a camera to follow two paths simultaneously in Blender, the logic here will feel instantly familiar.
- Preview each path as a rendered video before committing, and fix any collisions with geometry in the scene.
- Four flight paths is usually plenty for a solid scene, though you can unmute additional drone groups for more coverage.
Step 5: Let the AI Fill In the Blanks
- Run the workflow to send your drone footage through the Wan 2.1 inpainting group, where every missing piece gets hallucinated in, including convincing reflections in water features (the same reflective detail that matters when you’re simulating realistic water ripples in Blender).
- If you’re using SageAttention and Triton for speed, make sure to also install the SageAttention patch for this specific workflow, or you’ll end up with black frames instead of footage.
- The generated video then runs through a high-resolution composite step, which reprojects your original high-resolution image back onto the footage. Default settings work fine here for most scenes.
Step 6: Build the Training Dataset
- Once every drone video finishes generating, the workflow automatically compiles everything into COLMAP format, which is the standard input most Gaussian splat trainers expect.
- The completed dataset lands in your ComfyUI output folder, ready to hand off to a trainer.
Step 7: Train Your Gaussian Splat
- Paid options like Postshot exist, and open-source tools like LiftFeld work well too, but Brush is the easiest entry point: grab it from its GitHub releases page, launch the app, point it at your dataset folder, and click start.
- Training runs live, showing the point cloud building on one side and the reference image it’s training against on the other.
- You can start exploring the scene before training even finishes. Areas your drone actually flew through will look noticeably sharper, since those are the parts the model had the most reference data for, so send in extra flight paths for any area you want to look extra polished.
Where AI Goes From Here in This Space
What’s striking about this whole workflow is how much of it leans on stitching together separate AI models that were never designed to work together: a video diffusion model repurposed for spatial consistency, a depth estimator borrowed for geometry, and a custom-trained LoRA gluing it all together. That’s increasingly the shape of practical AI tooling in 3D right now: less about one model doing everything, and more about creative pipeline engineering connecting specialist models built by completely different teams. It’s the same spirit driving free tools that turn a photo into a 3D model locally, and it’s clearly the direction independent studios are going to keep pushing in, since the license terms actually allow it.
Watch the Full Breakdown
For the complete walkthrough, including the live demos of every failed approach and the final working pipeline in action, the source video is well worth watching in full.

Keep the Drone Flying
This kind of workflow moves fast, and the version covered here will almost certainly look outdated in six months, which is exactly why it’s worth bookmarking this space rather than this one workflow. If you build your own version of this pipeline, or fly your drone into something spectacularly broken, share it in the comments below. And if you want more of this kind of deep-dive coverage the moment it happens, stick around and check back for updates, since this is exactly the kind of tool we’ll be tracking closely as it evolves.

What do you think?
Join the Conversation